How to measure a castor
Looking to replace an old castor with a new one? Our guide to castor measurement should help you order with confidence. See below for video and step by step guidance on measuring up castors.
Watch the video on castor measurement
If you’d prefer seeing the castor measuring process in action, check out our video where Joel guides you through the steps. You can find the break down of each step further down this page:
Measurements we cover
- Determine what type of castor you need
- Castor Height
- Matching castor mount to application
- Checking Tread Width
- Check your weight requirements

Step 1 - Determine what type of castor you need
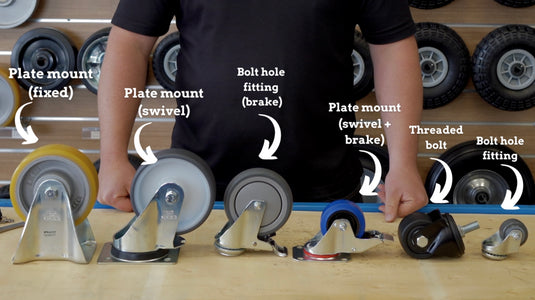
Before going further, it’s worth checking how your castor wheel is mounted to the application. This varies, so it’s important to check. A very common mount is the ‘plate’ mount with 4 bolts that affixes to your application.
Plate mount - Swivel
Plate mounts come in varieties like a swivel mount that allows 360 rotation of the castor smoothly in either direction.
Plate mount - Fixed
A fixed plate mount will keep your castor wheel in the same position - so won’t swivel around. This is also very common and sometimes used in combination with swivel plate castors for steering control.
Plate mount - Swivel + Brake
Another popular and commonly found plate mount castor is the variant with swivel action combined with a foot brake that keeps your application firmly locked in place.
Single bolt hole fitting
Moving away from the plate variants, there’s another way of mounting - a single pin or bolt hole castor mount. This also comes in plain swivel and swivel + brake options.
Single pin/bolt hole fitting - Thread bolt
Then there’s the castor mount with a single pin already riveted/built in that’s threaded. This makes mounting a matter of screwing it into place. These also offer 360 degree swivel action.
Fixed plate castor measurement
We’ll cover some of the other mounting types in future guides. For now we’re going to use one of the more typical configurations - the fixed plate castor.
Step 2 - Castor Height
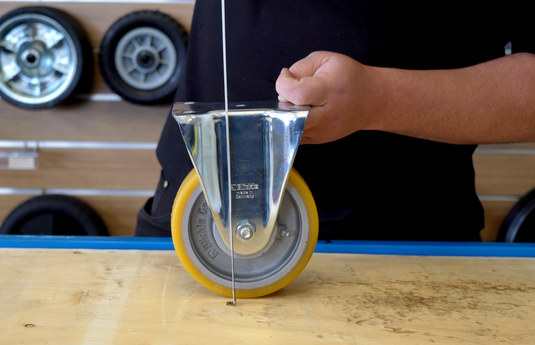
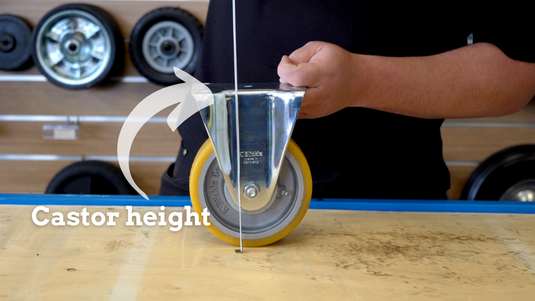
The first measurement for a fixed plate castor is to get the overall height of the castor, from the top of the plate, right down to where the wheel touches the ground.
Use your tape measure to take this measurement. If your castor is removed from the application, you can do this easier by turning the castor upside down and placing the mount/plate on your flat bench, keeping it stable while you get your measurement.
Step 3 - Matching castor mount to application
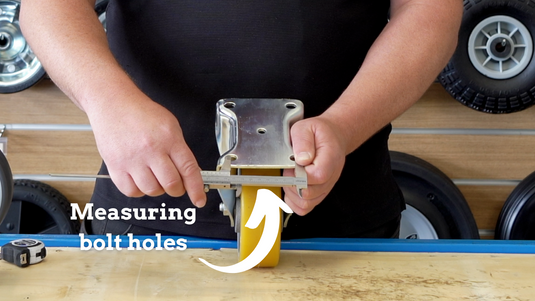
Next, you need to ensure your bolt mount centres on the application matches the replacement castor. Having the bolt pattern is critical to get a good fit.
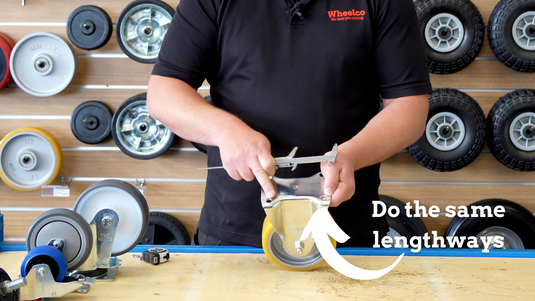
For a fixed plate castor these will usually be four main bolts - one in each corner of the plate. Use your calliper, taking measurements from the centres of the bolts horizontally:
3b -Then do the same lengthways
Step 4 - Checking Tread Width
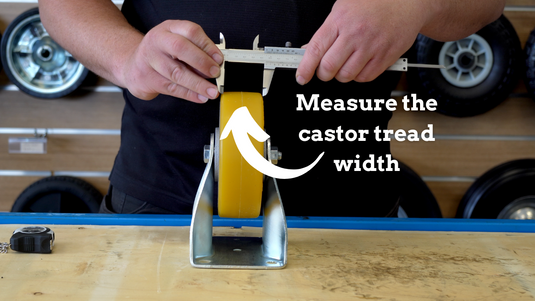
Something else to consider is to measure the tread width - this is where the castor’s wheel touches the floor. It’s not always a game changer depending on the application but it’s worth bearing in mind.
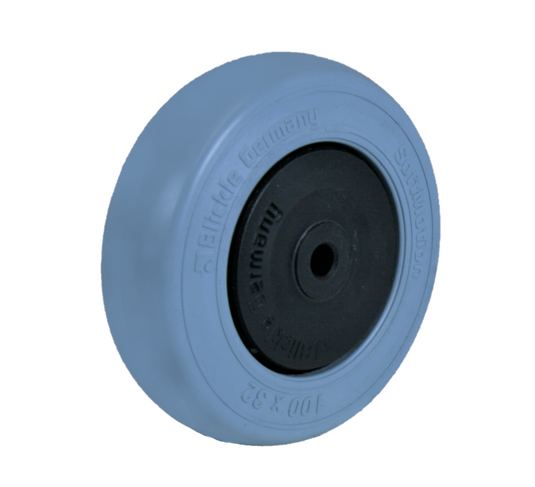
Simply take your callipers or measuring tape and take your reading across the width of the wheel. This is easier with the castor off, and placed upside down:
Step 5 - Check your weight requirements
Having a good understanding of the capacity requirements (and expected workload) of your application will help determine choices like weight rating, tread material, hub material and whether the castor has a bearing or not.
Remember, weight distribution changes when a load is added or removed from your application, and this isn’t always split evenly across all wheels. We always suggest giving yourself good headroom beyond what the total maximum load weight will be.
